Friday, 10 May 2013

Finished

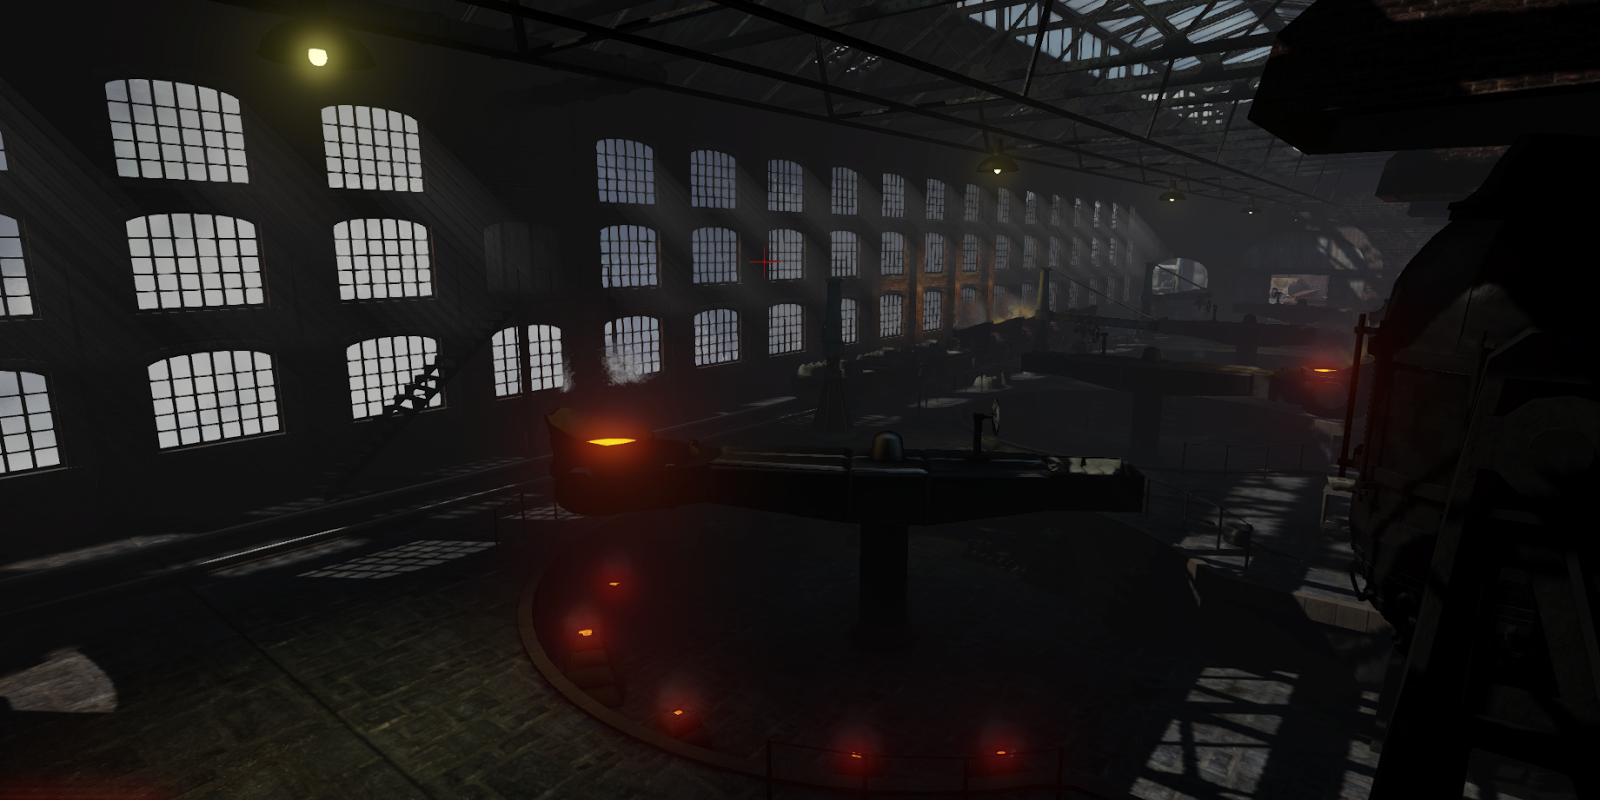
I have now finished my honours project, I am very happy with my final outcomes. Although i would change lot if i was start the project again. I am glad I choose a environemnt to create as my honours, but a may have choose a different location/theme. I am glad its differeent and not simlar to any other environemnt create by other students or people around on the interent etc... But the lack was resource information avialble to research the era of foundry I choose to create made it difficlut.

below is some screen shot of inside if my foundry environment.


Monday, 15 April 2013

Complex material

Because I am creating a foundry, I some point I am going to have to create a molten metal material so I decided to starting trying to create one now, rather than having to rush it at the end of the project.
Below is my current version of my molten metal material.

The material also aniamtes whitch adds to the affect.

From the final version I hope to improve the glow. As well as tweeking the colour so it is much yellow than orange. To complete the look I also hope to create a heat haze from the material if possible, as I am unsure at this stage whether I could achieve in the time.

Decals

To add extra detail and unqiueness to selected areas of the foundry i am going to use decals. Decals are a greae way to comsstumize an modular areas without having to remodel  unqiue quilities or retexture. Decals work by projecting a planar image onto a mesh. the decal material can support all map types like normal and spec. below are some decal I am currently using in my foundry.

Vertex painting

Vertex paint is a way of use the vertex of a static mesh as points to paint a new texture or texture and mesh. I used vertex painting to unqiuely paint the brick. This helped me stop the modular pices looking simlar. form the brick vertex paint i created 3 texture i could changed beween. the first wass the normal brick texture, the sceond was the brick texture with green moss on it and the third texture was the brick texture with black sutt on it.


A screenshot of the vertex material I created
  

Created assets

Below are renders of assets I have created for the inside of the ofundry some of the assets are texture and others have no texture or a pemptpr texture.

 
As this is this a WIP, and my confident that the final foundry will look good with all the texture maps. I also changed some foundry slighly, by removing all the roof windows near the roof fan, to make the fan stand out my and make the foundry alot darker.

Foundry size fully fixed

last time I have issuses with achieving the right size and space around my foundry. After some intail tweeking to asset scale I achieved the right size do now needed to retexture everything again. as well as importing alot much assets and buildings other buildings around the foundry. new assets include: roof, floor, windows, stairs, untexture bessemer and railway track.

Problem with foundry size.

After I created the more of the foundry struckture, I decided import the basic bessemer/turntable design model I created weeks basic, so I could walk around it in UDK and get a sense of scale. after doin this a noted a problem. The foundry bessesmer design was too big and looks silly in a small foundry.


The foundry was much to norrow and need to be widened it all would look alot better if it was extrended long.


At this stage astenics were not a consideration and I just want to get the size the space correct and then I can reimport and texture everything again. To get this quick fiz I scaled the modular pieces in UDK, the final version will have correctly scaled pieces and in propertion to each other.

Texturing modular pieces

For the past few weeks I have textured some of the outer pieces for my foundry as well as create a package and imported them into UDK, this will be the base my finished foundry. From past useage of UDK I now know how important it is to use correct name conventions for my assests as it will improve my work flow and help later in the project when there are alot more assets.

Below is as image of the outframe for my foundry.


Parallax Mapping

To create the texture for my Honours, I first start by getting a free source texture from a website like CGtextures.

Below is a the basic instruction of how I create my textures and parallax mapping.


The source image was a high res image, but was not seamless. so I created a seamless texture using photoshop. the Final seamless textures was then weather and save as a 512x512 texture


I was now at  the stage where I had a defuse brick, from this I could now create the normal, specular and add parallax mapping. the Create this first I had to create a normal map. so I created a height map (bump) from the clean seamless brick texture.


I then added the height map to crazy bump (a normal generating program) after tweaking the options in the crazy bump I got the look I was after. I then create a alpha channel for my normal map in photoshop and add a image that looks like the oringal height map, but with one difference, it has  slight blur to it, so the brick to mortor tanitstion better.

Left (normal map) right (aphla channel)
 

Parallax material in UDK break down and tweeking the paramitors.


Brick material in UDK with just Defuse


Brick Material with Defuse and Normal maps

Brick Material with Defuse and parallax mapping
 
Parallax mapping works by adding a bump off set to the normal map and choosing the aphla channel I create as the off set. the glossieness the he brick will go when I add a spec map. I think this a greate techque and I will be using on other surfaces like floor and roofs, Any surface that is flat. as test with mesh like the bessemer produce some bad results.

Bessemer Process

The main piece to my foundry willl be the besseme. A the bessemer was a new way of mass-producing steel. It was invented around 1850. This will be a great way to give my foundry more historial perpose and instrest. It will also act as a way of dating the foundry around 1850s- 1900s.

The important in steel producion of the bessemer can folow in the website link below.

http://en.wikipedia.org/wiki/Bessemer_process

http://en.wikipedia.org/wiki/W_%26_J_Galloway_%26_Sons


New foundry design.

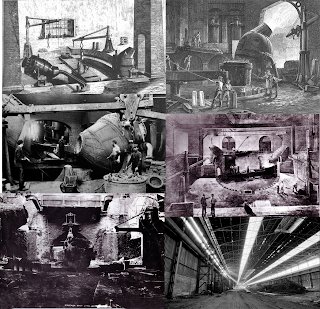
After looking at research image of real foundry and factories of the era, I noticed that my foundry design was too small and would not support and bessemer. So of this I change the design to closly match a image I found of a german foundry in 1880. Using the module pices I already created i design a shell for the factory struckture.

 
1880s German Foundry


The advangtage of choosing a simlar design to the one above, This will give my honours project more meaning by foucing, by builtings the foundry around a historial break through in steel production, The Bessemer.

Basic 3D design of german foundry


This design also has a add advantage that, the inside layout will be modular as well as and outter wall pieces. This design will fix correctly into the new foundry design and can be easily extrended and changed.
 

The modular foudry pieces can also be duplicated and changed and act as other buildings around the main foundry, that the player cannot walk into. this will be a great time saver and if the outter building need to be made more unqiue I create create some separate objects to make them stand out.

Sunday, 18 November 2012

Lowing the poly count.

Using the weld tool in 3Ds Max I cut down on the poly count by getting rid of unessary polys. This created more tri's but as it was goin into a game engine it didnt matter. After doin this I lower the poly count by almost half.


Modular pieces

I will create the modular pieces using 3Ds max, I have also created a custom unit and grid in 3Ds max which will snap to the grid in UDK. I create lots of different variations of wall and roofs piece. some of which have influence the design of my foundry. Below are a few examples of model pieces which I create and will not be using.

This design was scraped because the design looked too modern, The I decided to not use steel I beam and corrugated metal.
I liked the design, but the arch was too narrow
I widen the arches to give it a more industrial and added brick supports 
 
Below are some of the final designs for my modular pieces.
 
For these modular pieces I added a 3rd window to the side wall and added a front piece with arches.
 
 Theses pieces are always being tweeked to better design.

Blog Update

As ive not updated my for 5 weeks, I quickly recap what i have done.
I have garther research one my choosen environment a foundry. From this research I had design several layout for possible foundry designs. I also finalized the processes what which be shown  in the foundry (bessemer process) and the era of the foundry (1880-1920). looking at the reference images of foundrys, I determined how many modular pieces I need to create in 3Ds max. But  before I could model anything I needed to find out how to set up the unit scale in 3Ds max to UDK.          


My first foundry design + moodboard.

The choosen design is lot differnet compared to my first design. The new design will be uploaded in another post when it has been modeled in 3Ds max. 


Tuesday, 25 September 2012

UDK-Tests

Before I decide on the layout and look of the foundry I must test few ideas within UDK to see if they are possible.

This week I tested two things within UDK:

1. I want to create a Hot melted metal look texture and pouring metal if possible, first I researched whether it is possible to have pouring liquid or water and whether it can be adapted to be glowing metal liquid. I created a small scene in UDK and created a  fluid surface actor with a water material. I could possible modify the water material into glowing metal. I used a tutorial as a guide. I also found a video of a shader some created which a gives a realistic flowing lava look. Although this may be to difficult to replicate in the time I have to create the environment.

Print screen of the UDK scene with Small Pit of Water.


Tutorial
http://www.youtube.com/watch?v=4-qEHHorBAs

Flowing Lava Shader
http://www.youtube.com/watch?v=rdWrWfL5E4c

2. The second thing a create in UDK was a Banner/Flag made from cloth, which would hang from  wall all ceiling, although I didn't know if a cloth banner would be appropriate in a hot foundry with sparks. To help me achieve a cloth physics I used a tutorial as a guide.
UDK scene with 2 flowing cloth banners.

Tutorial
http://www.youtube.com/watch?v=fwXsHvlVryE&list=SP0C836EF4FD8D91B8&index=19&feature=plpp_video


First Week

This week for my Honours I start working on my on my project plan.

I also created a mind map of ideas of what I should do for my Honours project. The mind map included lots of ideas from different environments to a collection of assets. After contenplating a few different ideas.

 I decided to create a environment as I feel this would best show off my ablities in 3Ds Max as well as UDK. After deciding to create an environment I created a mind map of just environment ideas. Some of the better ideas of environment I was condsiding creating were a theater, production line (factory) and Docklands. But the ideas I decided to go with was a steel foundry.

 I decided to make a foundry because I like the ideas of creating industrial machinary with large cogs and ladles.


Thursday, 20 September 2012

What to do for my Honours project

After my first Honours lesson I am still unsure what to base my project on. In the lesson as a group we discuss each others ideas. From this I know I want to base my project on 3D modelling but I'm still unsure what to model or what theme. I want to become a 3D artist in the game industry and therefore want to use the honours project as a way of show casing my 3D work. I was advice to look at the level needed to become a 3D artist and what company expect and are asking for.

I looked at lots different game companies and the jobs they have to offer in and outside the UK. Some of these companies were:

1. Creative Assembly UK
     Applicable Jobs: 3D Environment Artist and additional game content
                                 3D character Artist
                                 http://www.creative-assembly.com/jobs/
  
 Comment: Both jobs stated they were looking for someone with Expert knowledge of Max/Maya an Photoshop. as well as expect know of game development pipeline. I will need to show these skill in this project to help me better me chances of becoming a 3D artist.

2. Rebellion UK
   Applicable Jobs: Environment Artist
http://www.rebellion.co.uk/jobs/artists/environment_artist/

Comments: For this job some of the skills they want from a 3D artist are: Ability to translate concept and reference artwork into 3D game assets, Strong UV mapping skills with efficient layouts, Model and texture both high and low polygon environments, including terrain, buildings and props.

3. Crytek Ukraine 
    Applicable Jobs: 3D Artists
http://www.crytek.com/career/offers/overview/kiev/art-animation/3d-modeler

Comments: For this job requirements, they ask you to provide them with work samples (10-15 best work samples in JPG format. they also looking for skill such as: the ability to model photorealistic environment based on photo reference and a the ability to create assets within given technical limitations.


Although I am no closer to deciding on what to do for my honours project, besides something 3D. I am now have a greater understanding of what is required and wanted for the role of a 3D artist. because of this I now know what skills I need to gain and highlight at the end of my project.       

Start of Honours Project

This blog was created to showcase my work for my honours project, it will include all my research, 3D work as well as any problems I face when creating and deciding on what to do for my honours project. By the end of the 3rd year this blog will fully document step by step all my processes I went through to get to my the end result.